Projects - Instructions for setting up an ACORN with a C86ACCP and Clearpath Servos
Forum


Jump To Forum
|
|
GCnC RevisionsPlease read this instruction manual to the end and do not proceed until you understand it fully. 1. AXIS Designations on C86ACCP board refer to Acorn Wizard as X = axis 1, Y = axis 2, Z = axis 3 and A = axis 4 (slave or rotary)
NOTE: Your axis letter designations may or may not match those on the C86ACCP board, but the numbers must.
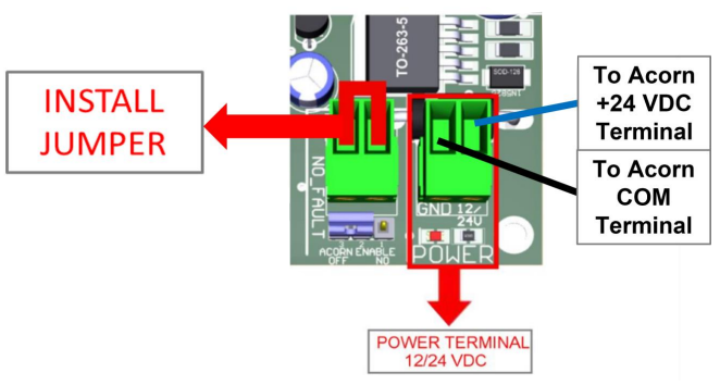
2. JUMPER TO SELECT THE ENABLE 3. Jumper settings for Active Axes: X (1), Y (2), Z (3) and A (4) (slave or rotary) enabled. Set all 4 Active Axis Jumpers to “ON” (BLU Circles)
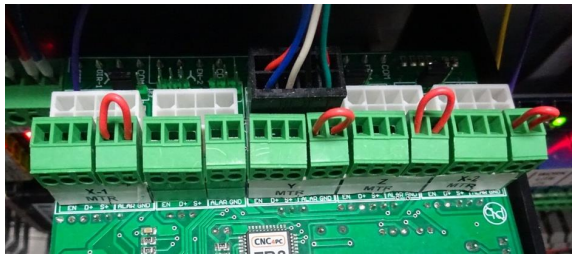
Remove all 4 “Hardware Slave” (pair) Jumpers for Software Pairing, and/or Independent Autosquare (RED Circle)
Y-Axis Hardware Paired X-Axis Hardware Paired
4. Terminal Power.
Install Jumpers HLFB terminals for all Active Axes (ORG wires in 2 terminal block)
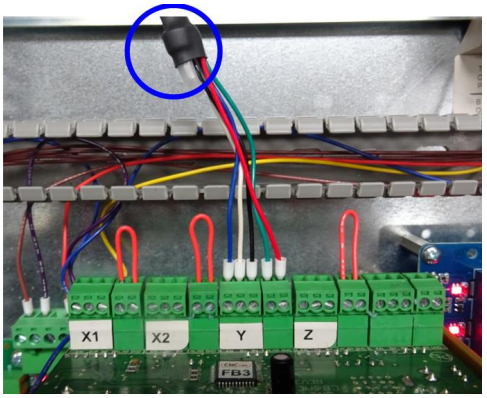
If your motor control wiring is the proper length and has the proper Molex MiniFit Jr. plugs installed, plug them, one at a time into the C86ACCP board’s motor connectors for testing.
In this picture you can see the ClearPath control wire connected to the board. For ease of wiring the orange, brown, red, and yellow wires have been spliced with a crimp nut (blue circle) and shrink sleeve into a short piece of red wire to enable a properly sized ferrule to fit into the terminal.
These are alternative instructions for setting to the C86ACCP written by Gary Campbell, an experienced user. I feel they may be easier to follow. Gary Campbell Disclaimer: Use caution. CNC machines can be dangerous machines. Neither Gary Campbell
Arturo Duncan
http://cnc4pc.com
Posted:
|


Jump To Forum
 Who is online